Friday, July 19, 2013
Happy Birthday
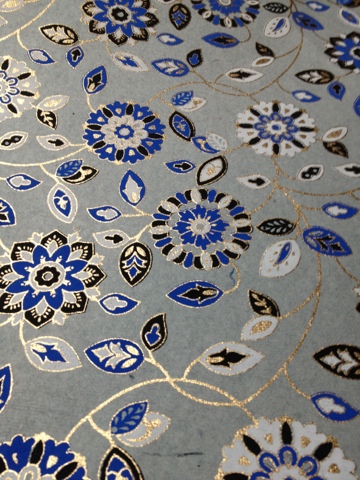
For my mom's birthday, I made this gift card box and gift card holder. I used my Cuttlebug machine and a box template thin die. Taking a cute birthday paper, I made the box. Then, I cut the "celebration" word out of the paper and glued it on to fit the box. I added more glitter than the paper originally had for balance. This was a fun way to disguise a gift card!
Monday, May 27, 2013
Black and White Card
For this card, I used thin dies. I played around with different patterned white and cream papers on black textured card stock for a rich look. The flower is layered together with the petals bent to add depth. Using the Cuttlbug machine, I cut the flower, hummingbird,and butterfly out. After bending petals on the scored lines, I put the flower together using a brad. I used the gem brad to add detail. I added glitter glue to the butterfly and the hummingbird.
![]() |
| Paper flower, butterfly and humming bird are made from the Cuttlebug Machine and thin dies I got at a craft fair. |
![]() |
| Some of the supplies used for this card: craft white ink, various thin die (purple), and patterned white and cream papers. |
Saturday, May 11, 2013
Mother's Day Card
![]() |
| The butterfly punch is from the Martha Stewart Collection. It is the punch anywhere. I like using glitter paper with these little flutterblies! |
![]() |
| Add any word stamp for any occasion! |
![]() |
| Details on the fabric flower. |

The inside of the card has the two butterflies above. I used the same fabric paper; however, I added glitter glue and liquid pearl to accent the butterfly.
Saturday, May 4, 2013
Nurses Day Cards
![]() |
| Happy Nurses Week 2013 |
The "thanks so much" bandages are perfect for this card. To make this card:
1. Cut your card stock. 4x4, 3 3/4 x3 3/4 and 3 1/2 x 3 1/2
2. Attach the back to layers first is making large quantities to save time.
3. Stamp the white card stock first with middle bandage ( I stamp all the cards before switching to next color)
4. Stamp the side bandages in another color and stamp the word stamp.
5. Attach to card. I punched a hole to attach to a gift.
All supplies used on this card are Stampin' UP!
![]() |
| Assembling Nurses Week Card! |
![]() |
| When doing big projects, it is a good idea to stamp in stages. |
Sunday, April 14, 2013
Umbrella Shower Layered Card
![]() |
| When choosing where to place your cut outs, make sure you like how they look when the card is open too. |
Here where I live it has been raining a lot! I got the inspiration to make this card from looking outside. This card takes time to make, but the results are worth it!
To make this card:
1. Find the image papers and card stock for your project.
2. Cut out the images from your papers and use punches as well.
3. Use a die-cutting machine to cut the hearts out of the card stock. Use a bigger heart for the front and a slightly smaller heart for the inside.
4. Adhere images and punches as desired. Add glitter to images as desired.
1. Find the image papers and card stock for your project.
2. Cut out the images from your papers and use punches as well.
3. Use a die-cutting machine to cut the hearts out of the card stock. Use a bigger heart for the front and a slightly smaller heart for the inside.
4. Adhere images and punches as desired. Add glitter to images as desired.
![]() |
| Front and first inside view. This card measure 12X 5 1/2 with folds on 4 and 8 (scoring the paper will make this easier) |
![]() |
| Full inside view and first inside view here. You can write you note on the back , insert a note, or write around the images. I chose to write on the back panel. I like these cards for an art piece to display when I get them. The note on the back will remind the people of the special occasion too. |
![]() |
| Matching punch and stamp from Stampin' UP! |
For You Gift Card
This gift card is for a shower I am going to soon. I added the heart with the ribbon to make the "nest". To make this card: I cut out the chicks for paper I found at he scrapbook store. I ran the pink background through my Cuttlebug with a bubble embossing folder. I punched the heart out this the same paper as the chicks ( it was the back side) and adhered the flower. Then I took a glue pen and swirled it for the nest and laid the ribbon gently on the glue. Let dry and adhere heart. I finally stamped the "best wishes" and the back of the card with the date and signed the "created by" line!
![]() |
| Outside and inside view. I added and flower on the inside for a nice touch. |
![]() |
| My new dial stamp for Stampin'UP! Love it! |
Thursday, April 4, 2013
Birthday cake
This is my brother's cake. I made a yellow cake out of the Betty Crocker cookbook. It came out great. The only issue was releasing from the pan. With this cake, it is especially important to grease (butter) and flour the pan extremely WELL. The middle of my cake did break, however, I pieced it back together with a chocolate ganache filling. See my chocolate decadent cake post for the recipe. I used the chocolate butter cream recipe in the Betty Crocker Cookbook as well. I whipped it until is was fluffy and easy to spread. I applied a "crumb" layer frosting. chilled for 30 min and then frosted the second final layer. I piped the detail around the cake using the same large flower Wilton's flower tip that I used for the cupcakes below and then wrote the "39". Everyone enjoyed the cake and cupcakes. The frosting tasted like mousse!
![]() |
| My Brother's Birthday Cake! |
![]() |
| Butter cream Chocolate Frosting Whipped and Piped onto to the cake. |
I made gluten free cupcakes for a family member unable to eat the cake. I used the same butter cream frosting and piped it on with a large flower tip. They turned out nice and everyone got a treat at the birthday. I baked and frosted the cupcakes first to avoid in contamination and save time on clean up in between steps.
![]() |
| Gluten-Free Vanilla Cupcakes |
![]() |
| I piped the frosting first on the Gluten-Free Cupcakes so not to contaminate the frosting prior to decorating the cake. This saved time and clean up. |
Monday, March 25, 2013
Spring Cards!
Spring is finally here. What a great time to make cheery spring cards. Easter is on it's way. It's a great time in sharing in the joy of our Faith. New beginnings are about to start. Spring Cards will bring joy to those whose receive them. Have fun as the sunshine starts to melt the winter blues away and the flowers pop up.
I used an embossing die to make the pink "flower" the birds are sitting on (above). I layered gold glitter paper on the yellow card stock and finished the card with a "word" stamp. The cards are 4x4 ( Cut 4x8).
![]() |
| Two different spring cards with the same patterned paper. |
![]() |
| The embossing folder changes plain paper into a fun background |
I used an embossing die to make the pink "flower" the birds are sitting on (above). I layered gold glitter paper on the yellow card stock and finished the card with a "word" stamp. The cards are 4x4 ( Cut 4x8).
Sunday, March 24, 2013
Butterfly Garden Card With Matching Embossed Background
My husband and boys went to the craft store with me! This was a really sweet thing for them to do. I don't think it was there first choice, but they like to see mom/wife happy too. Well, I did not see this wonder product....my hubby did. I decided to give it a try and wow it is fun. The set is an embossing folder for you die cut/embossing machine and a matching stamp set. I followed the instruction on the box and stamped the image first in a green ink (yes all green) on a green background. I attached it to the pink paper and then............. I took my new favorite embellishment.........glitter glue pens! I glitter glued the leaves on the edge only and the flowers I used two pinks to add dimension. Then, I did the butterfly bodies in green and their wings in purple. I let dry over night. When I saw it in the morning, I was amazed on how pretty it turned out. I added the fuzzy ribbon at the bottom and I am going to add mini buttons (3) to the ribbon. I want to find the right color. This card was fairly quick to do. I made it in under 30 minutes (except for the dry time of the glitter of coarse). This would make a lovely Mother's Day card.
![]() |
| The embossing folder matches the stamp set. |
Reflection
![]() |
| This card means "The Joy of Life". I found this really cool as I found out after I made the card. Do something for yourself every once in a while is part of the joy of life. |
Today, I am in a reflecting mood. Our lives can be very stressful. How do we care for ourselves?
![]() |
| Glitter was added to the sunflowers and Smooch was used on the leaves and fruit to make it pop a little. I distressed the paper with a sandblock. This is core color paper. |
I don't always do the best at letting the stresses of life roll off me. Sometimes I have to remember to take of myself; otherwise, I won't be able to take care of others around me.
So this is what I did today! Here is the work of my reflection.
I took some pattern paper by Graphic 45 in both 12x12 and the same 6x6 paper. I cut out pieces I wanted to used and arranged on my card. By using the different size paper, you get different sizes of the same image. It adds depth to your work. My aunt suggested I buy the paper packs in both sizes when available for this reason. I have love the results every time.
![]() |
| Graphic 45 Paper |
![]() |
| French Country Paper |
Tuesday, March 5, 2013
Cut out flower card with diagonal fold
|
| The portion underneath the gold butterfly is one piece cut out. It turn out like lace. Very pretty. I added the white flowers on either side separately. |
![]() |
| The paper I started out with... |
![]() |
| My Favorite glitter glue! |
![]() |
| The best glue stick ever. This is great for all projects. |
|
| I used the Big Bite for the brads and to punch holes in the flowers |
|
| The card paper was sanded on both sides to give the distressed look |
![]() |
| I added pearls to the butterfly and flowers |
This project was super fun to create. I spent an evening cutting the patterned paper out then gluing it back to the card in different ways. I made the brads by punching the paper and then gluing the paper to a make your own brad I got from Stampin' UP! a few years ago. I added glitter to the flowers in subtle areas to make them pop. After that dried (overnight), I added the pearls (as shown above). The card is a 12 by 5 1/2. Then I cut the top at an diagonal to get the effect you see above. Score you paper at 4 and 8 inches and fold before you glue you piece on to help know where to place things (i.e. brads and such). Have fun and enjoy your creativity!
I love this punch! This is from the Martha Stewart Collection. It punches anywhere on the page. I, especially, like that you can use your punched paper for another card. I am going to use it for my next card (as I could line up the butterflies) and it looks like they are flying off the card.

I made the brads too. I used a Stampin' UP! make a brad kit I got a few years ago. I, first, punched, the paper, then I used the glue stick (shown above) to adhere the paper and brad cover together. I placed three brads on the flowers on the gray side and three on the black ribbon border on the black side. I added glitter to the flowers to give a little pop!
Shown above is the brad I made with patterned paper. I attached it to the glitter gold paper, which I tore to give the distressed look.
Subscribe to:
Posts (Atom)
Welcome to my Blog: StampGirlCreates by Nola. I am an independent Stampin Up Demonstrator . I love paper crafting and inspiring others ...
-
This card was made with a soda can. Lots of fun. First, you take a pop can and wash it. Next, after it is dry take a knife a punch a whole t...
-
This card uses punches, stamps, and embossing folders. This is a fun little card to make for a friend to say thank you. It is chee...