Wednesday, January 23, 2013

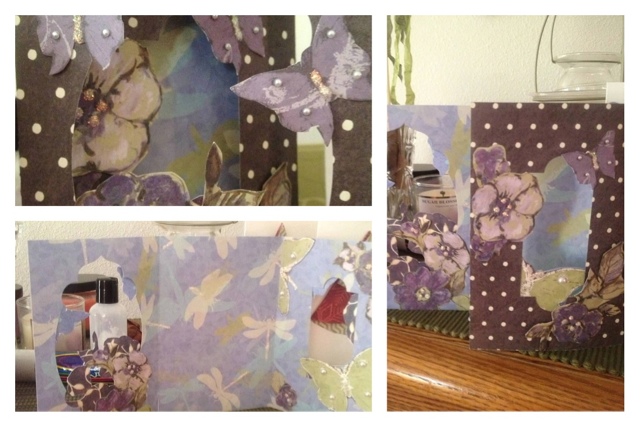
Beauty in Butterflies


Glue paper pieces and add to card in layers.  Watch your card become art.

This is one of my favorite cards to make.  I used decorative paper.  I cut out pieces and applied to the frame area of card.  To make the "frame", use two different punches or thin-dies.  Finally I added pearls and glitter glue to the flowers and butterflies.  I let and dry overnight and then my card was complete!
As you open this, the card transforms before your eyes!

Cake Creations!


I used Wilton's pans to make the Elmo and Firetruck Cake.  The Flower Cake I used a DeMarle' Pan.  The Fire House was done freestyle.  I always use homemade buttercream frosting.  To get the vibrant colors, I used Wilton's solid/gel food colors. 

These cakes were to celebrate birthdays and fun days!  The Elmo cake was one of my boys favorites.  The Firetruck and Firehouse was for their 5th birthday.  My mom did the Firehouse and I did the Truck.   The Flower cake was for a shower.

For my boys 2nd Birthday!  Cake #1
Flower Power!

Baby 6x6 Mini Album


This album is an inexpensive gift you can make for the ones you love.  I made this album out of Stampin' UP! card stock (it was made about 6 years ago and it is still holding up like I made it yesterday).   I cut 12 x 12 down to 6X6 pages.  You can add as many pages as you want.  Plus it hangs on the wall nicely ( on a hook is best). 

The babies pictured are my twin boys. 
To Make this Mini Album, all you need is the following supplies:
 
1. Colorful Card Stock (cut to 6X6)
2. Background Stamps
3. Letter Stamps
4. Punches
5. Ribbons
6.  Adhesive
7.  Office hinge ring to adhere album
8.  Pictures
9.  Journal Pens
 
Stamp your background onto your papers and apply your layout as desired. Punch hole in left corner and place ring.  Tie multiple ribbons on ring to give less of an "office" look.  The nice thing about this album is you can add pages later as you want.


Family Memories Wall Scrapbook

You don't have to do a whole book to scrapbook. Try starting with one or two pages for a wall grouping. Then, change the pages, as you scrapbook more. Insert the "older" pages into an album. Before you know it, you will have a whole album of memories. Below I used a magnetic scrapbook frame to hold my 12 by 12 page and a 12 by 12 clipboard found at a local craft store


Mini Album Wine Themed

This handmade mini album uses decorative papers, inks, and card stock stickers.

1. Cover the album with paper using a book binding glue or strong bond adhesive.

2. Cut individual pages using different papers

3. Cut embellishments and adhere to your pages.

4. Journal or add photos as desired.


Tuesday, January 22, 2013

Hawaiian Flower Lollipops

I was given these cute treat after my surgery this week. Even though I did not make these myself, I thought they were cute and would be fun make.
1. Make lollipops
2. Adhere decorative flowers to wrapper on front
3. Tie ribbon as desired.
4. Add note tag and adhere to back of lollipop.


Friday, January 18, 2013

Arizona Can Butterfly Card

The Arizona Tea Can has beautiful detail when used in this butterfly card.
I made this card for a friend's retirement. It uses an embossing folder, die cut thin die, and the Cuttlebug's C , A, B plates. I used an Arizona tea pop can as the "paper" for the butterfly. Next send some plain card stock through the embossing folder and you have a delightful card.


This is the thin die that does all the magic.  In this picture you can see
the die still has left over pieces of the can.  They come out easy by poking
at it with a paper piercing too


The Cuttlebug Machine.  This machine folds up and easy to carry with you for those fun crop night with friends.


The Yellow Cardstock embossed paper is place on the white cardstock card.
Tearing the edge of the white cardstork and folding it up helped give
this card some warmth.


Monday, January 7, 2013

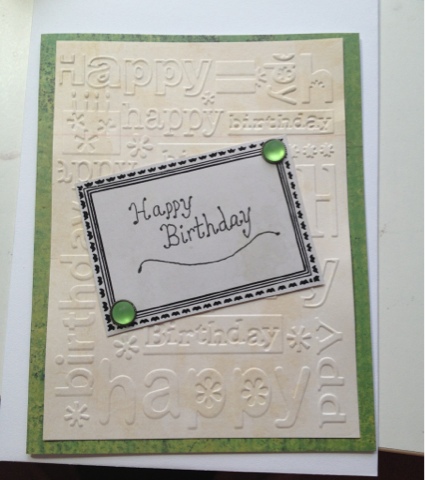
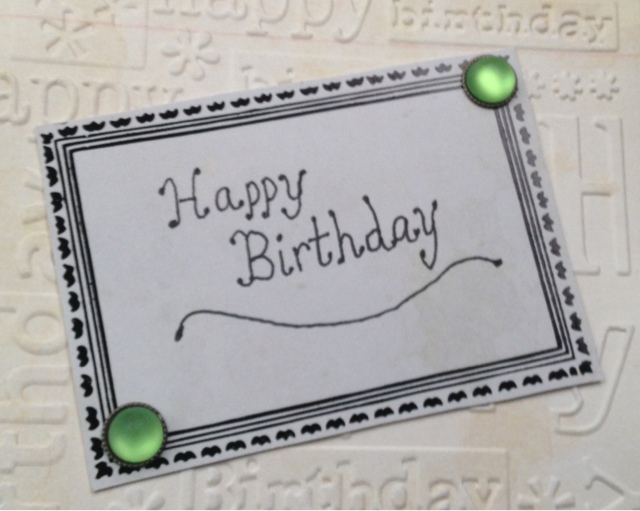
Embossed Happy Birthday Card

This card uses my Cuttlebug machine (see picture) and embossing folder. Cut to desired card size and add cute tag and embellishments.


Sunday, December 30, 2012

My newest craft gadget!

This is what I got for Christmas! It set brads and punches holes with ease. I have the smaller version and love it. This one will be great for big pieces of paper as I can punch into paper now 6 inches.


Chocolate Decadent Cake

This yummy creation is a holiday party favorite at our house. My friend gave me this recipe a while back. It never disappoints. It is best served with a touch of vanilla ice cream or whip cream.   See below for the recipe.  Enjoy!


Pour the chocolate ganache over the cake after the cake cools for about 10- 15 minutes.
Serve slightly warm or cool. It tastes yummy no matter what!

Sifting powder sugar on top makes it complete to serve
Recipe:
 
Chocolate DecadentCake Recipe

Preheat oven to 350 degrees.   Baketime: 40-50 minutes or until pulls from edges and cake tester come our clean.
Ingredients  Needed:
1 Cup boiling water                                                        
3 oz unsweetened chocolate (cubes)                          
8 Tablespoons butter                                                     
1 tsp vanilla extract                                                         
2 cups granulated sugar                                                 
2 eggs separated (you will use yolk and whites)

1 tsp baking soda

½ cup sour cream

 2 cups flour

 1 tsp baking powder
 
1.        Pour boiling water over chocolate andbutter.  Stir until melted.  
2.        Stir in vanilla and sugar. 
3.       Whiskin egg yolks. 
4.        Mix baking soda and sour cream and whisk intochocolate mixture. 
5.        Sift flour and baking powder together.  Add to batter and stir. 
6.        In separate bowl beat egg whites until stiff(but not dry).  Fold into batter. 
7.       Pourinto grease/floured 10 inch spring form pan and bake until edges pull slightlyaway from sides and tooth pick/ tester comes out clean. 
8.       Cool10 minutes then unmold.  Wait until the cakecool before pouring on Ganache.
 
Chocolate Ganache
Ingredients:

2 Tablespoonsbutter
¾ cup semisweetchocolate chips (I use dark chocolate chip sometimes)
6 Tablespoonscream (fresh whipping cream)
1 ¼ cup poweredsugar sifted
1 tsp vanilla
Melt allingredients over low heat in a saucepan. Cool slightly.  Pour and spreadover cake.  

Friday, December 28, 2012

Sprite Pop Can Christmas Tree

This is made with a die cut using my Cuttlebug machine. After washing your pop can out, cut it open into "paper". Then, center the can so the Sprite logo with be down the tree. Take a star punch and punch the lemon part of the can. Adhere the the star to the tree.


 Welcome to my Blog: StampGirlCreates by Nola.    I am an independent Stampin Up Demonstrator .  I love paper crafting and inspiring others ...